目前判断元素出现在可视区域的有三种方案, 我们来逐一讲解:
(1)offsetTop, scrollTop
(2)getBoundingClientRect
(3)IntersectionObserver
一、方法一:offsetTop + scrollTop
(1)offsetTop: 当前元素相对于其 offsetParent 元素的顶部内边距的距离。
offsetParent: 指向最近的包含该元素的定位元素或者最近的 table, td, th, body 元素。
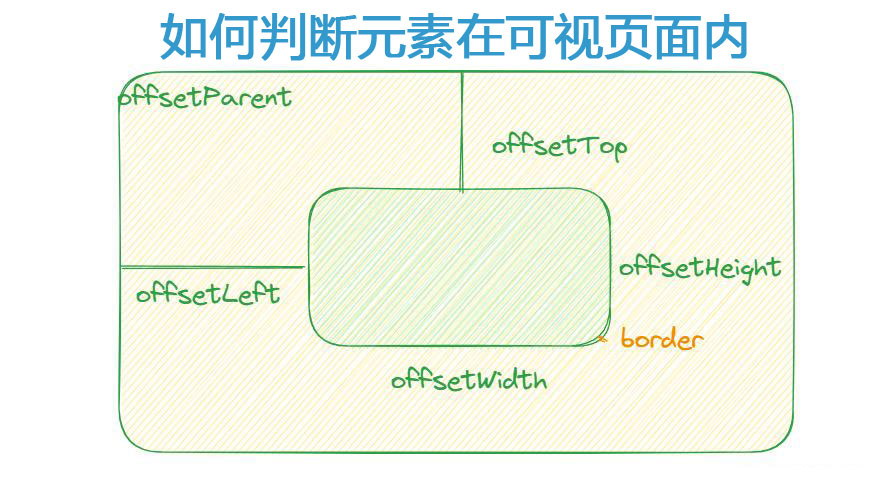
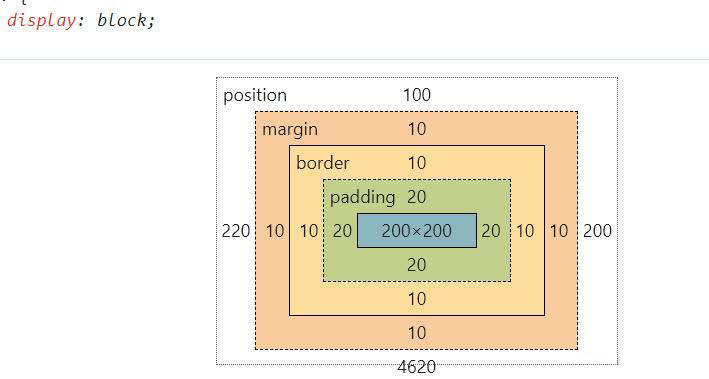
offsetWidth, offsetHeight包括了content, padding, border, 不包括margin
clientWidth, clientHeight包括了content, padding 不包括border, margin
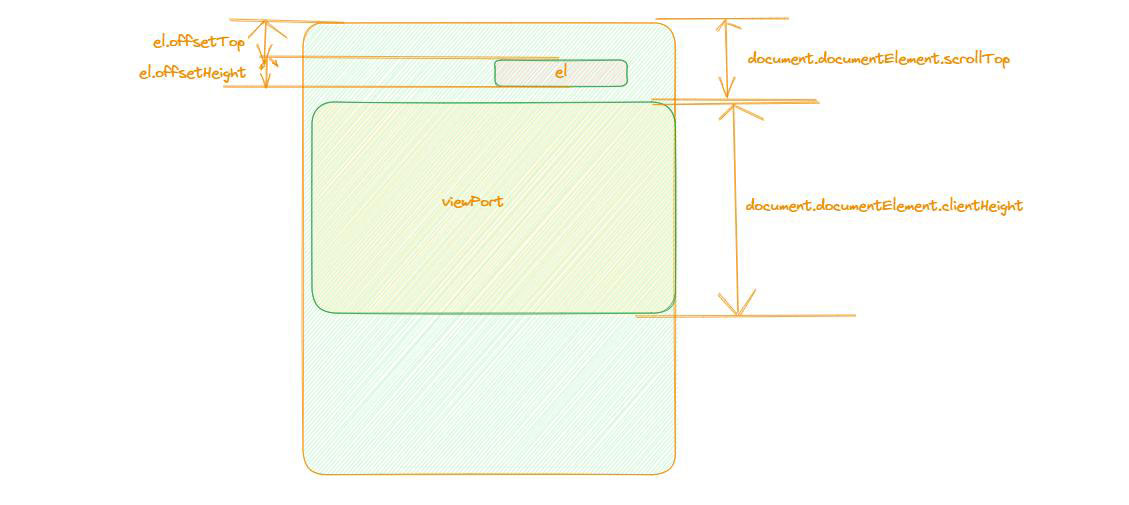
(2)scrollTop: 元素的内容顶部到它的视口可见内容的顶部的距离的度量。
(3)实现如下:
由图可知, 考虑纵轴方向的话。
要么元素不在可视区域下方, 此时应该满足 el.offsetTop < document.documentElement.scrollTop + document.documentElement.clientHeight。
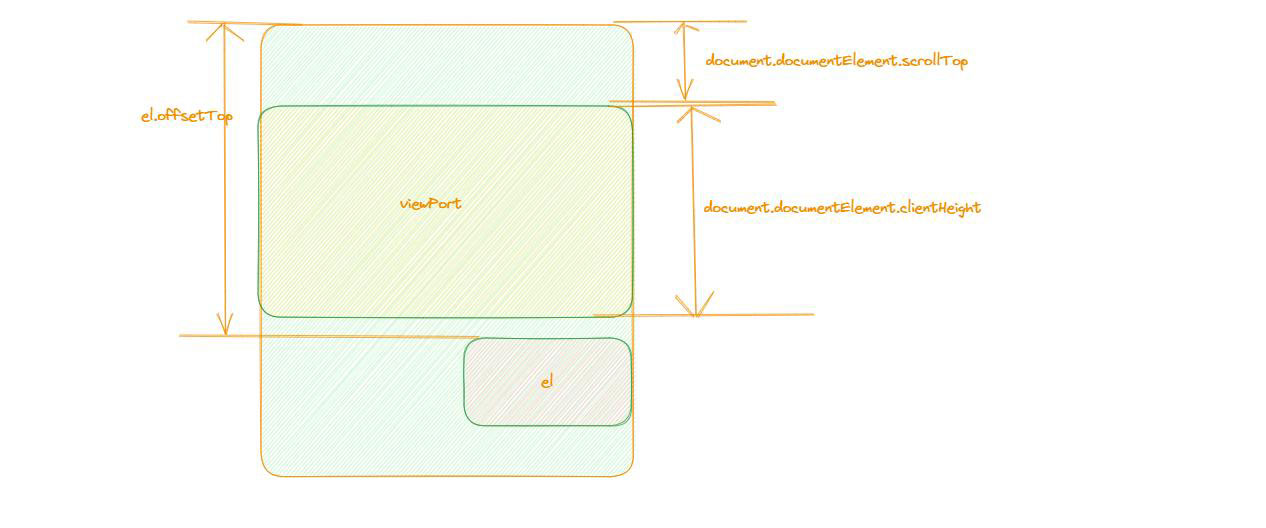
要么元素不在可视区域上方, 此时应该满足 el.offsetTop > document.documentElement.scrollTop - el.offsetHeight。
横向方向同理(此处忽略),代码实现如下
const isInView = (el) => {
  const documentScrollTop = document.documentElement.scrollTop;
  const documentClientHeight = document.documentElement.clientHeight;
  if (el.offsetTop > documentScrollTop + documentClientHeight) {
    console.log('元素在可视区域下方');
  } else if (el.offsetTop < documentScrollTop - el.offsetHeight) {
    console.log('元素在可视区域上方');
  } else {
    console.log('在可视区域啦');
  }
}
const scrollEvent = throttle(isInView);
document.addEventListener('scroll', () => {
  scrollEvent(targetNode);
})
二、方法二:getBoundingClientRect
(1)定义:Element.getBoundingClientRect() 返回一个 DOMRect对象,其提供了元素的大小及其相对于视口的位置。
(2)熟悉API。
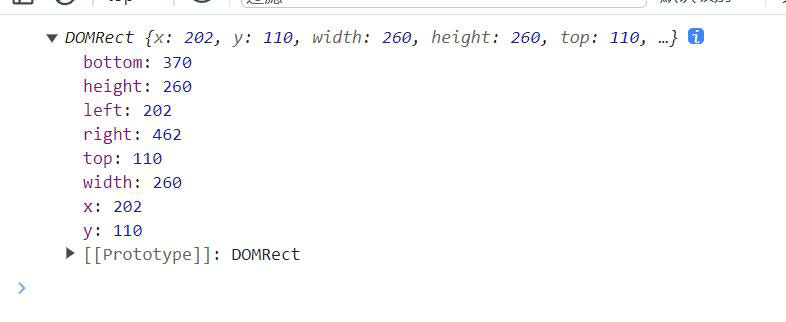
对于该盒子, position left是220, top是100, margin设置了10, border设置了10, padding设置了20, width和height都是200。 此时打印出来的DOMReact对象如何所示。
其width打印出来为260, 实际上是width + padding + border的值, height同理。
其y打印出来为110, 实际上是top + margin的值, x同理。
其bottom打印出来为370, 实际上是y + width的值(其实就是不算margin-bottom的值)
此处为MDN的图。
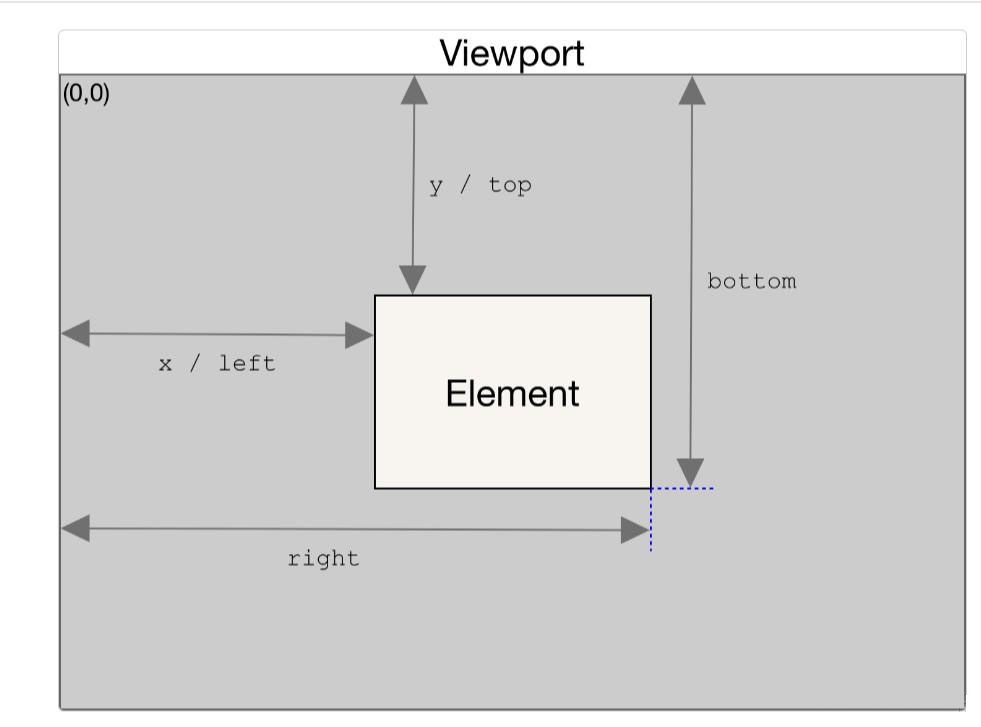
因为他的x, y, bottom, left都是相对于视图窗口而言, 故实现起来也很方便。
要让元素不在窗口上方, 则 bottom 应该大于等于 0。
要让元素不在窗口下方, 则 y 应该小于等于视图高度。
横向同理, top应该大于等于0, x应该小于等于视图宽度。
代码如下:
const targetNode = document.querySelector('.child');
const isInView = (el) => {
  const documentClientHeight = document.documentElement.clientHeight;
  const { bottom, y } = el.getBoundingClientRect();
  console.log(bottom, y);
  if (bottom < 0) {
    console.log('元素在可视区域上方')
  } else if (y > documentClientHeight) {
    console.log('元素在可视区域下方')
  } else {
    console.log('在可视区域啦')
  }
}
const scrollEvent = throttle(isInView);
document.addEventListener('scroll', () => {
  scrollEvent(targetNode);
})
三、方法三:IntersectionObserver
(1)定义: IntersectionObserver 接口(从属于 Intersection Observer API)提供了一种异步观察目标元素与其祖先元素或顶级文档视口(viewport)交叉状态的方法。其祖先元素或视口被称为根。
(2)当一个 IntersectionObserver 对象被创建时,其被配置为监听根中一段给定比例的可见区域。一旦 IntersectionObserver 被创建,则无法更改其配置,所以一个给定的观察者对象只能用来监听可见区域的特定变化值。
按照我们前面两种方法,其实都需要去频繁调用getBoundingRect(), scrollTop()方法等, 这些方法都会导致回流重绘且都在主线程上运行, 因此频繁触发、调用可能会造成性能问题。这种检测方法极其怪异且不优雅。
Intersection Observer API 会注册一个回调函数,每当被监视的元素进入或者退出另外一个元素时 (或者 viewport),或者两个元素的相交部分大小发生变化时,该回调方法才会被触发执行。
其实就是浏览器提供了对应的方法, 让主线程不需要再为了监听元素相交而辛苦劳作,浏览器会自行优化元素相交管理。
(3)熟悉API。
可以通过new IntersectionObserver(callback, options)实例化一个observe对象。
options中可以通过root属性指定root元素, 通过threshold属性指定交集触发回调的阈值。
let options = {
 root: document.querySelector("#scrollArea"),
 rootMargin: "0px",
 threshold: 1.0,
};
创建一个 observer 后需要给定一个目标元素进行观察。
const targetNode = document.querySelector('.child');
const intersectionObserver = new IntersectionObserver((entries) => {
  console.log(entries);
})
intersectionObserver.observe(targetNode);
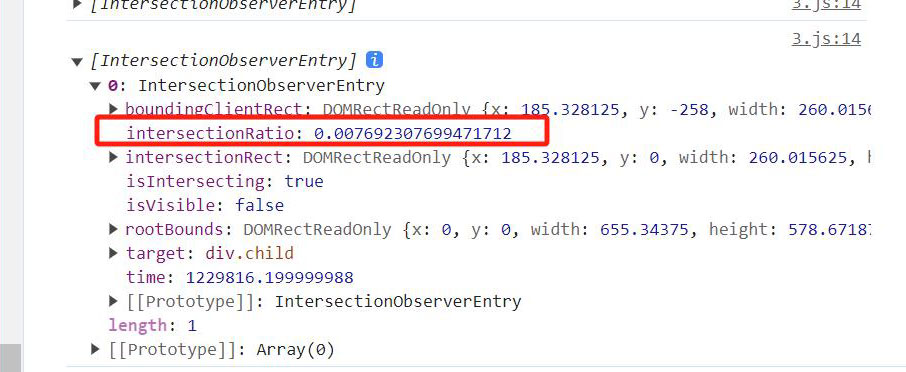
我们通过intersectionRatio去判断即可, 如果小于等于0, 则说明已经在视野外了。
代码如下:
const targetNode = document.querySelector('.child');
const intersectionObserver = new IntersectionObserver((entries) => {
  if (entries[0].intersectionRatio <= 0) {
   console.log('视野之外')
  } else {
  console.log('视野之内');
  }
})
intersectionObserver.observe(targetNode);
注册的回调函数将会在主线程中被执行。所以该函数执行速度要尽可能的快。如果有一些耗时的操作需要执行,建议使用 Window.requestIdleCallback() 方法。
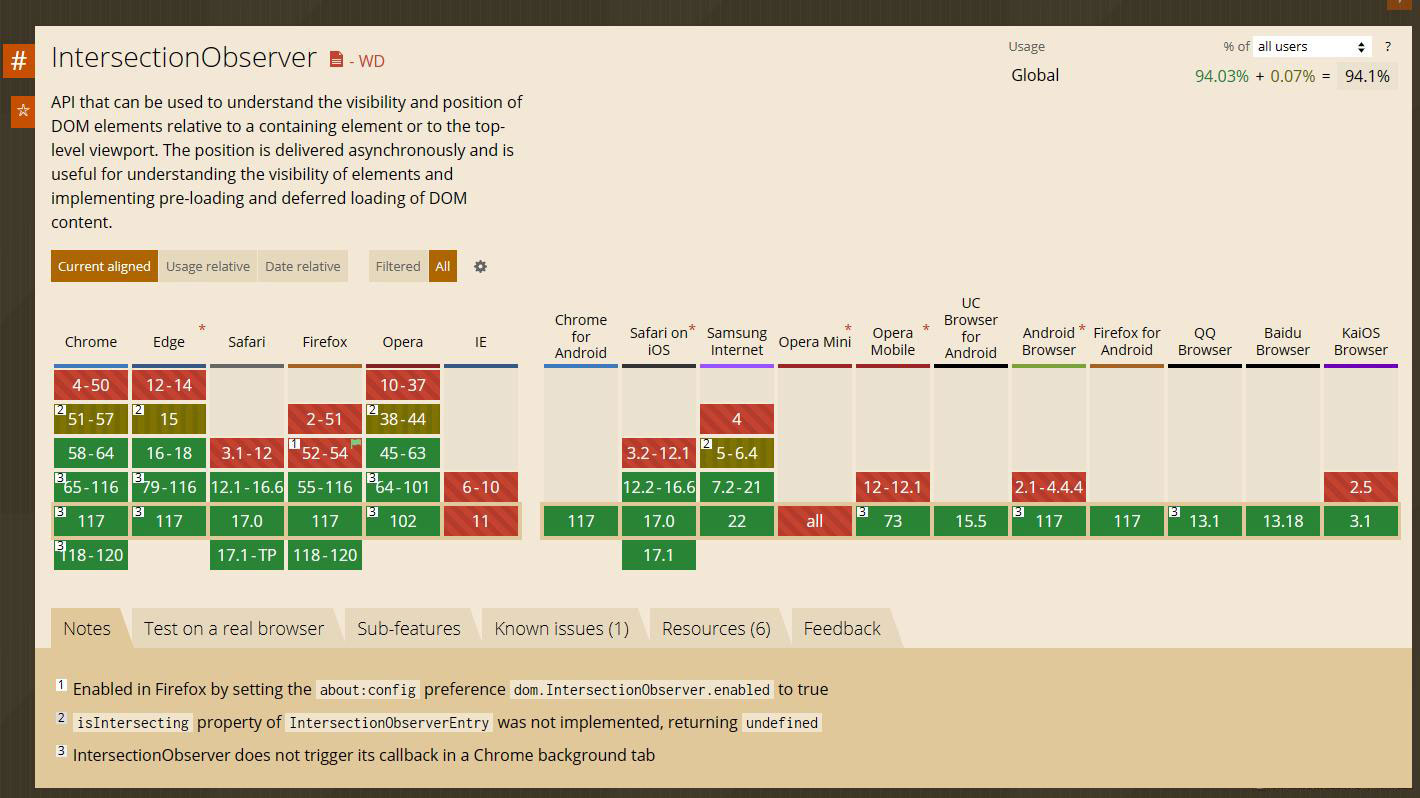
四、兼容性
(1)对于第一种方法都是基本API了。
(2)对于第二种也基本兼容了。

(3)对于第三种, 兼容性相对来说就要差一些了。